使用loguru優雅的輸出日志
VSole2021-10-25 08:42:50
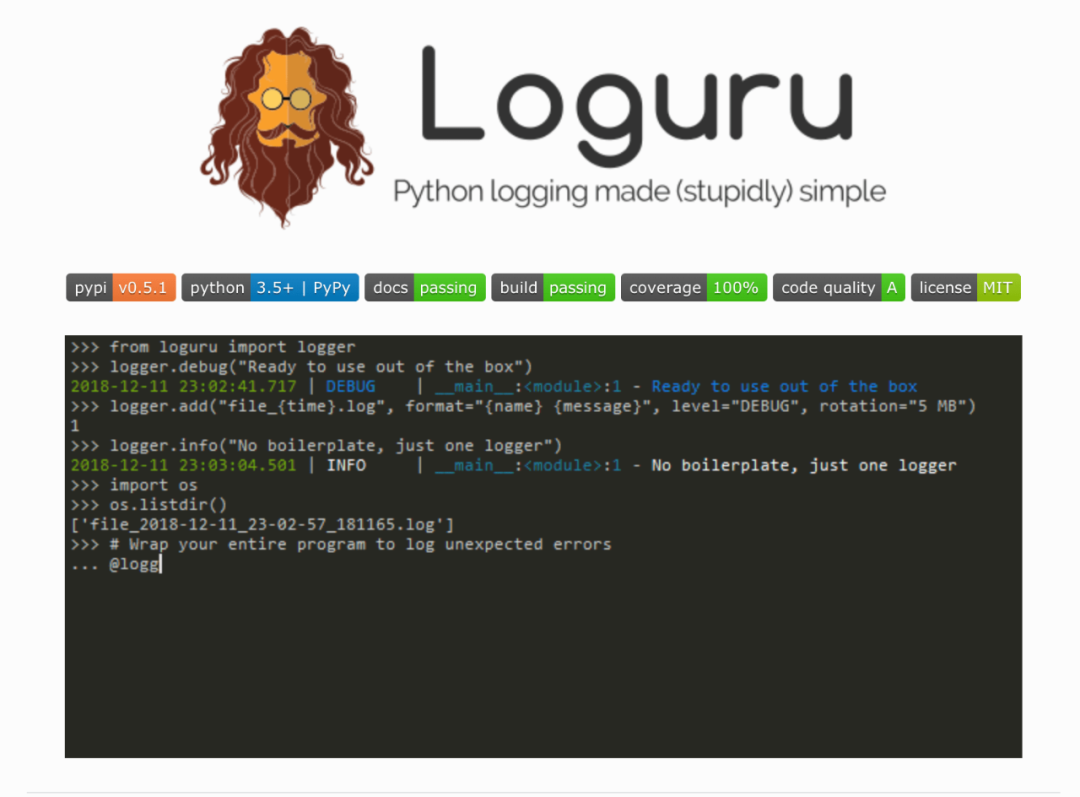
Loguru: 更優雅的日志記錄解決方案!
loguru 是一個 Python 簡易且強大的第三方日志記錄庫,該庫旨在通過添加一系列有用的功能來解決標準記錄器的注意事項,從而減少 Python 日志記錄的痛苦。
1. 引入原因
簡單且方便的幫助我們輸出需要的日志信息!
- 使用
Python來寫程序或者腳本的話,常常遇到的問題就是需要對日志進行刪除。一方面可以幫助我們在程序出問題的時候排除問題,二來可以幫助我們記錄需要關注的信息。 - 但是,使用自帶自帶的
logging模塊的話,則需要我們進行不同的初始化等相關工作。對應不熟悉該模塊的同學來說,還是有些費勁的,比如需要配置Handler/Formatter等。
import logging
logger = logging.getLogger('xxx')
handler = logging.StreamHandler()
formatter = logging.Formatter('%(asctime)s %(name)-12s %(levelname)-8s %(message)s')
handler.setFormatter(formatter)
logger.addHandler(handler)
logger.setLevel(logging.DEBUG)
logger.debug('This is a %s', 'test')
- 而
loguru就是一個可以 開箱即用 的日志記錄模塊,我們不再需要復雜的初始化操作就可以通過如下命令來記錄日志信息了。
# pip
$ pip install loguru
2. 功能特性
有很多優點,以下列舉了其中比較重要的幾點!
- 開箱即用,無需準備
- 無需初始化,導入函數即可使用
- 更容易的文件日志記錄與轉存/保留/壓縮方式
- 更優雅的字符串格式化輸出
- 可以在線程或主線程中捕獲異常
- 可以設置不同級別的日志記錄樣式
- 支持異步,且線程和多進程安全
- 支持惰性計算
- 適用于腳本和庫
- 完全兼容標準日志記錄
- 更好的日期時間處理
3. 快速上手
介紹 loguru 的常用操作和功能介紹!
[1] 開箱即用,無需準備
loguru并沒有什么黑科技,只是它預先幫助我們設置好了相關的配置,我們導入之后即可直接使用。
from loguru import logger
logger.debug("That's it, beautiful and simple logging!")
[2] 無需初始化,導入函數即可使用
- 如何添加處理程序(
handler)呢? - 如何設置日志格式(
logs formatting)呢? - 如何過濾消息(
filter messages)呢? - 如何如何設置級別(
log level)呢?
# add
logger.add(sys.stderr, \
    format="{time} {level} {message}",\
    filter="my_module",\
    level="INFO")
[3] 更容易的文件日志記錄與轉存/保留/壓縮方式
# 日志文件記錄
logger.add("file_{time}.log")
# 日志文件轉存
logger.add("file_{time}.log", rotation="500 MB")
logger.add("file_{time}.log", rotation="12:00")
logger.add("file_{time}.log", rotation="1 week")
# 多次時間之后清理
logger.add("file_X.log", retention="10 days")
# 使用zip文件格式保存
logger.add("file_Y.log", compression="zip")
[4] 更優雅的字符串格式化輸出
logger.info(
    "If you're using Python {}, prefer {feature} of course!",
    3.6, feature="f-strings")
[5] 在線程或主線程中捕獲異常
@logger.catch
def my_function(x, y, z):
    # An error? It's caught anyway!
    return 1 / (x + y + z)
my_function(0, 0, 0)
[6] 可以設置不同級別的日志記錄樣式
Loguru會自動為不同的日志級別,添加不同的顏色進行區分,當然我們也是可以自定義自己喜歡的顯示顏色樣式的。
logger.add(sys.stdout,
    colorize=True,
    format="<green>{time}</green> <level>{message}</level>")
logger.add('logs/z_{time}.log',
           level='DEBUG',
           format='{time:YYYY-MM-DD :mm:ss} - {level} - {file} - {line} - {message}',
           rotation="10 MB")
[7] 支持異步且線程和多進程安全
- 默認情況下,添加到
logger中的日志信息都是線程安全的。但這并不是多進程安全的,我們可以通過添加enqueue參數來確保日志完整性。 - 如果我們想要在異步任務中使用日志記錄的話,也是可以使用同樣的參數來保證的。并且通過
complete()來等待執行完成。
# 異步寫入
logger.add("some_file.log", enqueue=True)
[8] 異常的完整性描述
- 用于記錄代碼中發生的異常的
bug跟蹤,Loguru通過允許顯示整個堆棧跟蹤(包括變量值)來幫助您識別問題。
logger.add("out.log", backtrace=True, diagnose=True)
def func(a, b):
    return a / b
def nested(c):
    try:
        func(5, c)
    except ZeroDivisionError:
        logger.exception("What?!")
nested(0)
[9] 結構化日志記錄
- 對日志進行序列化以便更容易地解析或傳遞數據結構,使用序列化參數,在將每個日志消息發送到配置的接收器之前,將其轉換為
JSON字符串。 - 同時,使用
bind()方法,可以通過修改額外的record屬性來將日志記錄器消息置于上下文中。還可以通過組合bind()和filter對日志進行更細粒度的控制。 - 最后
patch()方法允許將動態值附加到每個新消息的記錄dict上。
# 序列化為json格式
logger.add(custom_sink_function, serialize=True)
# bind方法的用處
logger.add("file.log", format="{extra[ip]} {extra[user]} {message}")
context_logger = logger.bind(ip="192.168.0.1", user="someone")
context_logger.info("Contextualize your logger easily")
context_logger.bind(user="someone_else").info("Inline binding of extra attribute")
context_logger.info("Use kwargs to add context during formatting: {user}", user="anybody")
# 粒度控制
logger.add("special.log", filter=lambda record: "special" in record["extra"])
logger.debug("This message is not logged to the file")
logger.bind(special=True).info("This message, though, is logged to the file!")
# patch()方法的用處
logger.add(sys.stderr, format="{extra[utc]} {message}")
logger = logger.patch(lambda record: record["extra"].update(utc=datetime.utcnow()))
[10] 惰性計算
- 有時希望在生產環境中記錄詳細信息而不會影響性能,可以使用
opt()方法來實現這一點。
logger.opt(lazy=True).debug("If sink level <= DEBUG: {x}", x=lambda: expensive_function(2**64))
# By the way, "opt()" serves many usages
logger.opt(exception=True).info("Error stacktrace added to the log message (tuple accepted too)")
logger.opt(colors=True).info("Per message <blue>colors</blue>")
logger.opt(record=True).info("Display values from the record (eg. {record[thread]})")
logger.opt(raw=True).info("Bypass sink formatting\n")
logger.opt(depth=1).info("Use parent stack context (useful within wrapped functions)")
logger.opt(capture=False).info("Keyword arguments not added to {dest} dict", dest="extra")
[11] 可定制的級別
new_level = logger.level("SNAKY", no=38, color="<yellow>", icon="?")
logger.log("SNAKY", "Here we go!")
[12] 適用于腳本和庫
# For scripts
config = {
    "handlers": [
        {"sink": sys.stdout, "format": "{time} - {message}"},
        {"sink": "file.log", "serialize": True},
    ],
    "extra": {"user": "someone"}
}
logger.configure(**config)
# For libraries
logger.disable("my_library")
logger.info("No matter added sinks, this message is not displayed")
logger.enable("my_library")
logger.info("This message however is propagated to the sinks")
[13] 完全兼容標準日志記錄
- 希望使用
Loguru作為內置的日志處理程序? - 需要將
Loguru消息到標準日志? - 想要攔截標準的日志消息到
Loguru中匯總?
handler = logging.handlers.SysLogHandler(address=('localhost', 514))
logger.add(handler)
class PropagateHandler(logging.Handler):
    def emit(self, record):
        logging.getLogger(record.name).handle(record)
logger.add(PropagateHandler(), format="{message}")
class InterceptHandler(logging.Handler):
    def emit(self, record):
        # Get corresponding Loguru level if it exists
        try:
            level = logger.level(record.levelname).name
        except ValueError:
            level = record.levelno
        # Find caller from where originated the logged message
        frame, depth = logging.currentframe(), 2
        while frame.f_code.co_filename == logging.__file__:
            frame = frame.f_back
            depth += 1
        logger.opt(depth=depth, exception=record.exc_info).log(level, record.getMessage())
logging.basicConfig(handlers=[InterceptHandler()], level=0)
[14] 方便的解析器
- 從生成的日志中提取特定的信息通常很有用,這就是為什么
Loguru提供了一個parse()方法來幫助處理日志和正則表達式。
pattern = r"(?P<time>.*) - (?P<level>[0-9]+) - (?P<message>.*)"  # Regex with named groups
caster_dict = dict(time=dateutil.parser.parse, level=int)        # Transform matching groups
for groups in logger.parse("file.log", pattern, cast=caster_dict):
    print("Parsed:", groups)
    # {"level": 30, "message": "Log example", "time": datetime(2018, 12, 09, 11, 23, 55)}
[15] 通知機制
import notifiers
params = {
    "username": "you@gmail.com",
    "password": "abc123",
    "to": "dest@gmail.com"
}
# Send a single notification
notifier = notifiers.get_notifier("gmail")
notifier.notify(message="The application is running!", **params)
# Be alerted on each error message
from notifiers.logging import NotificationHandler
handler = NotificationHandler("gmail", defaults=params)
logger.add(handler, level="ERROR")
[16] Flask 框架集成
- 現在最關鍵的一個問題是如何兼容別的
logger,比如說tornado或者django有一些默認的logger。 - 經過研究,最好的解決方案是參考官方文檔的,完全整合
logging的工作方式。比如下面將所有的logging都用loguru的logger再發送一遍消息。
import logging
import sys
from pathlib import Path
from flask import Flask
from loguru import logger
app = Flask(__name__)
class InterceptHandler(logging.Handler):
    def emit(self, record):
        logger_opt = logger.opt(depth=6, exception=record.exc_info)
        logger_opt.log(record.levelname, record.getMessage())
def configure_logging(flask_app: Flask):
    """配置日志"""
    path = Path(flask_app.config['LOG_PATH'])
    if not path.exists():
        path.mkdir(parents=True)
    log_name = Path(path, 'sips.log')
    logging.basicConfig(handlers=[InterceptHandler(level='INFO')], level='INFO')
    # 配置日志到標準輸出流
    logger.configure(handlers=[{"sink": sys.stderr, "level": 'INFO'}])
    # 配置日志到輸出到文件
    logger.add(log_name, rotation="500 MB", encoding='utf-8', colorize=False, level='INFO')
4. 要點解析
介紹,主要函數的使用方法和細節 - add()的創建和刪除
- add() - 非常重要的參數
sink參數 - 具體的實現規范可以參見官方文檔
- 可以實現自定義
Handler的配置,比如FileHandler、StreamHandler等等 - 可以自行定義輸出實現
- 代表文件路徑,會自動創建對應路徑的日志文件并將日志輸出進去
- 例如
sys.stderr或者open('file.log', 'w')都可以 - 可以傳入一個
file對象 - 可以直接傳入一個
str字符串或者pathlib.Path對象 - 可以是一個方法
- 可以是一個
logging模塊的Handler - 可以是一個自定義的類
def add(self, sink, *,
    level=_defaults.LOGURU_LEVEL, format=_defaults.LOGURU_FORMAT,
    filter=_defaults.LOGURU_FILTER, colorize=_defaults.LOGURU_COLORIZE,
    serialize=_defaults.LOGURU_SERIALIZE, backtrace=_defaults.LOGURU_BACKTRACE,
    diagnose=_defaults.LOGURU_DIAGNOSE, enqueue=_defaults.LOGURU_ENQUEUE,
    catch=_defaults.LOGURU_CATCH, **kwargs
):
- 另外添加
sink之后我們也可以對其進行刪除,相當于重新刷新并寫入新的內容。刪除的時候根據剛剛add方法返回的id進行刪除即可。可以發現,在調用remove方法之后,確實將歷史log刪除了。但實際上這并不是刪除,只不過是將sink對象移除之后,在這之前的內容不會再輸出到日志中,這樣我們就可以實現日志的刷新重新寫入操作
from loguru import logger
trace = logger.add('runtime.log')
logger.debug('this is a debug message')
logger.remove(trace)
logger.debug('this is another debug message')
原文鏈接:https://www.escapelife.site/posts/d4521b7.html

VSole
網絡安全專家