
Android Java層源碼調試
編譯idegen
- 成功會在源碼根目錄生成android.iml 和 android.ipr兩個文件。
# 在源碼根目錄執行source build/envsetup.shlunch 22mmm development/tools/idegen# or make idegensudo development/tools/idegen/idegen.shsudo chmod 777 android.imlsudo chmod 777 android.ipr
編輯導入配置
sudo deepin-editor android.iml
- 搜索excludeFolder,在下面加入這些配置。
- 過濾不需要的源碼模塊。
"file://$MODULE_DIR$/bionic" />"file://$MODULE_DIR$/bootable" />"file://$MODULE_DIR$/build" />"file://$MODULE_DIR$/cts" />"file://$MODULE_DIR$/dalvik" />"file://$MODULE_DIR$/developers" />"file://$MODULE_DIR$/development" />"file://$MODULE_DIR$/device" />"file://$MODULE_DIR$/docs" />"file://$MODULE_DIR$/external" />"file://$MODULE_DIR$/hardware" />"file://$MODULE_DIR$/kernel" />"file://$MODULE_DIR$/out" />"file://$MODULE_DIR$/pdk" />"file://$MODULE_DIR$/platform_testing" />"file://$MODULE_DIR$/prebuilts" />"file://$MODULE_DIR$/sdk" />"file://$MODULE_DIR$/system" />"file://$MODULE_DIR$/test" />"file://$MODULE_DIR$/toolchain" />"file://$MODULE_DIR$/tools" />"file://$MODULE_DIR$/.repo" />
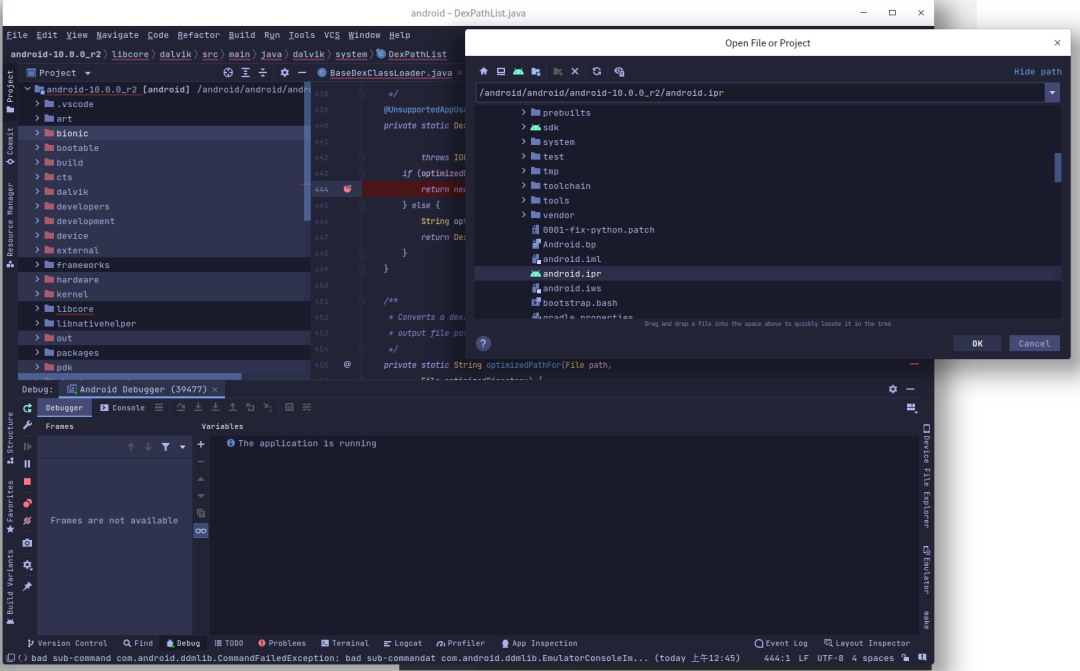
導入Android Studio
- 通過AS的Open an existing Android Studio project選項選擇源碼根目錄的android.ipr就可以導入源碼。
排除tests 目錄 右鍵
- mark Directory as Excluded
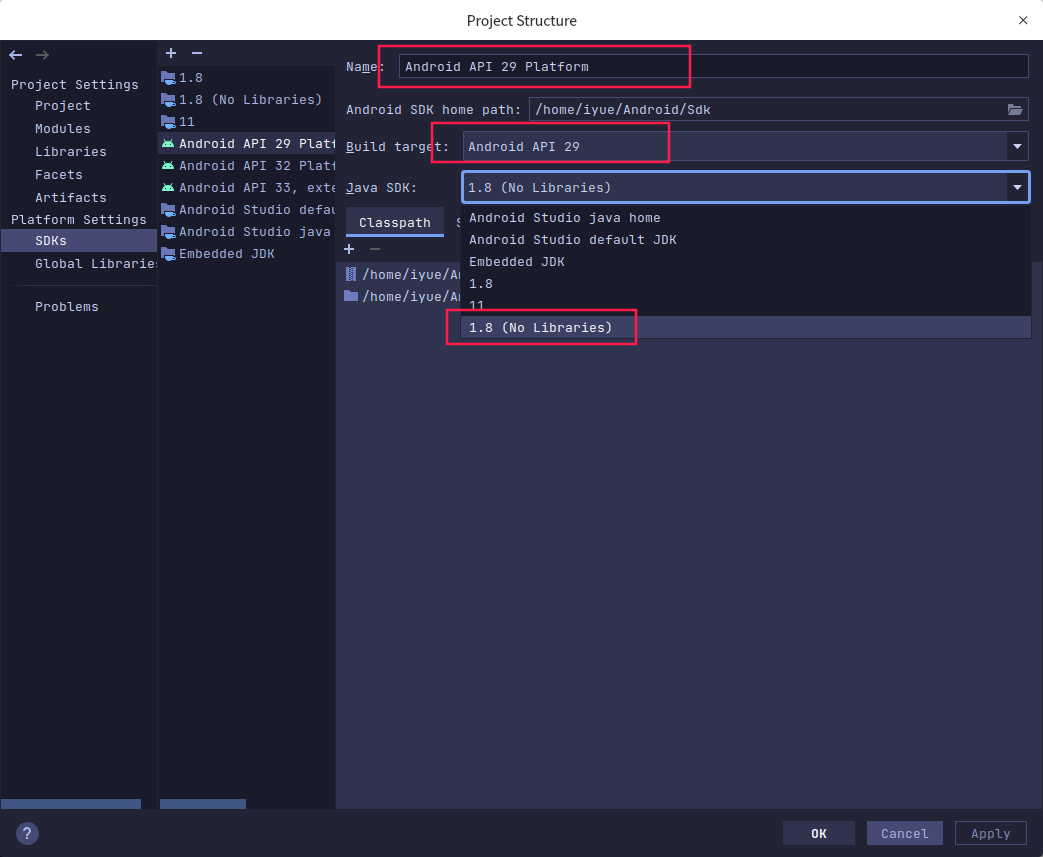
配置 Android源碼項目
點擊File -> Project Structure–>SDKs配置項目的JDK、SDK。
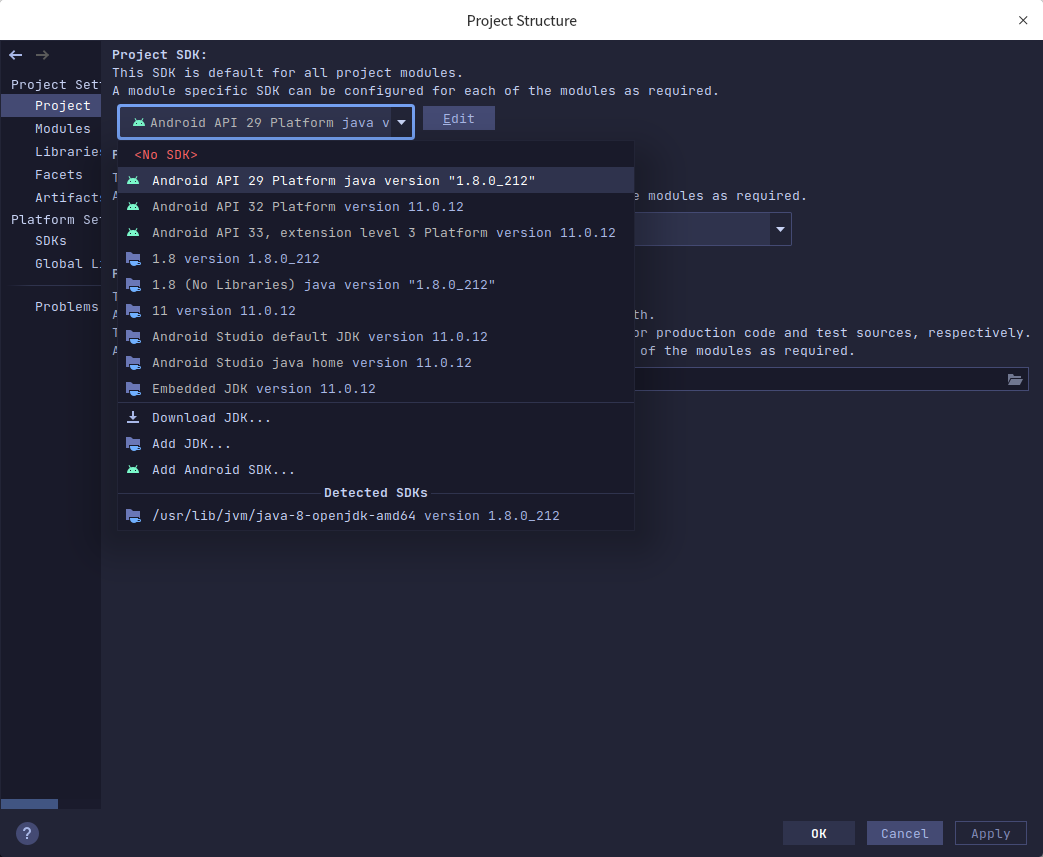
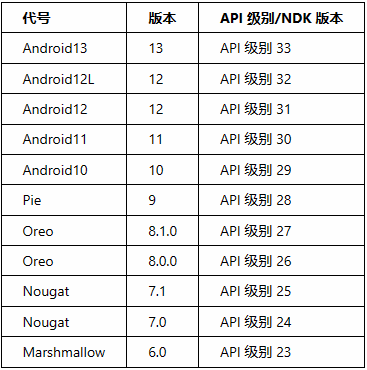
根據源碼版本選擇對應API級別 這里使用的Android10 對應29。
點擊 Edit API SDK。
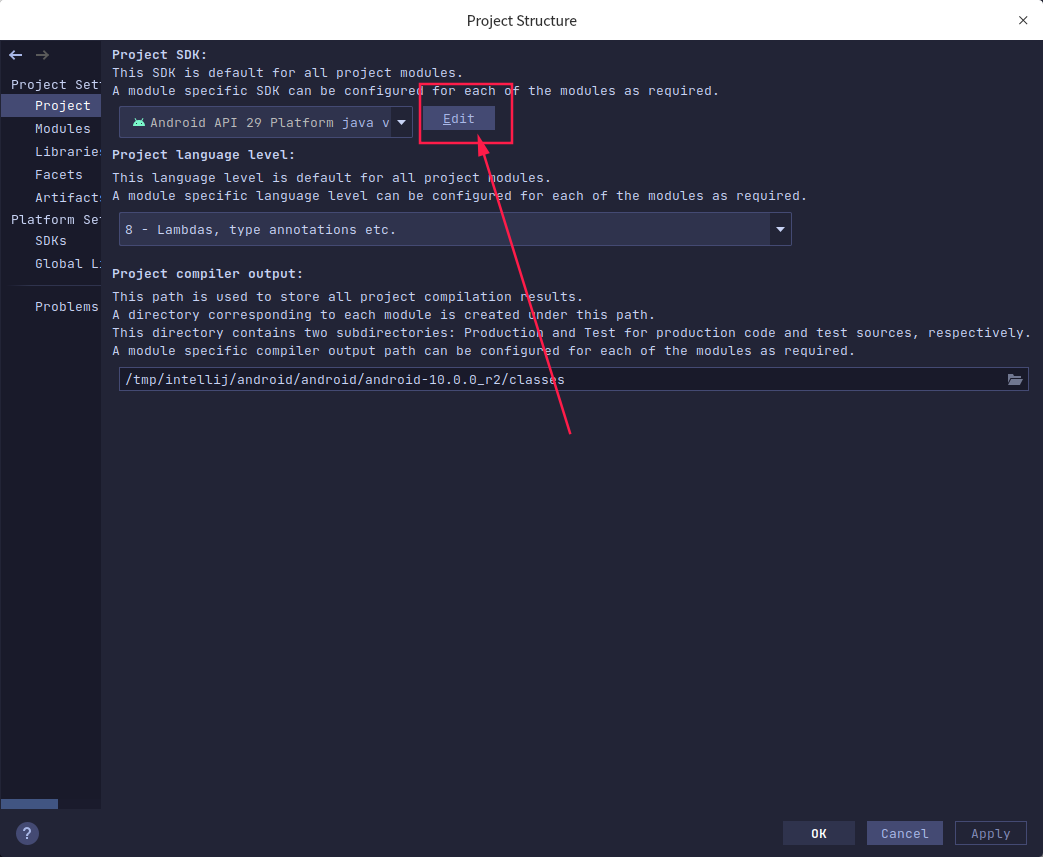
- 不用管下面的配置選項
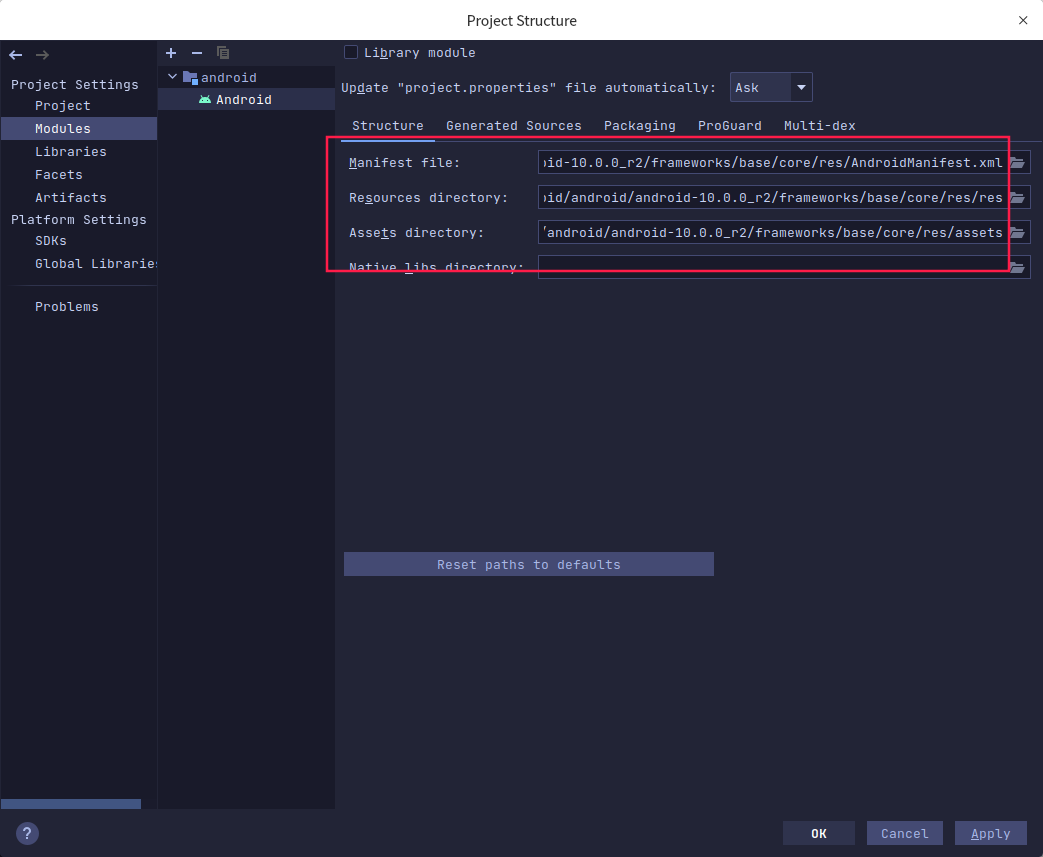
Modules Structure
/android/android/android-10.0.0_r2/frameworks/base/core/res/AndroidManifest.xml/android/android/android-10.0.0_r2/frameworks/base/core/res/res/android/android/android-10.0.0_r2/frameworks/base/core/res/assets
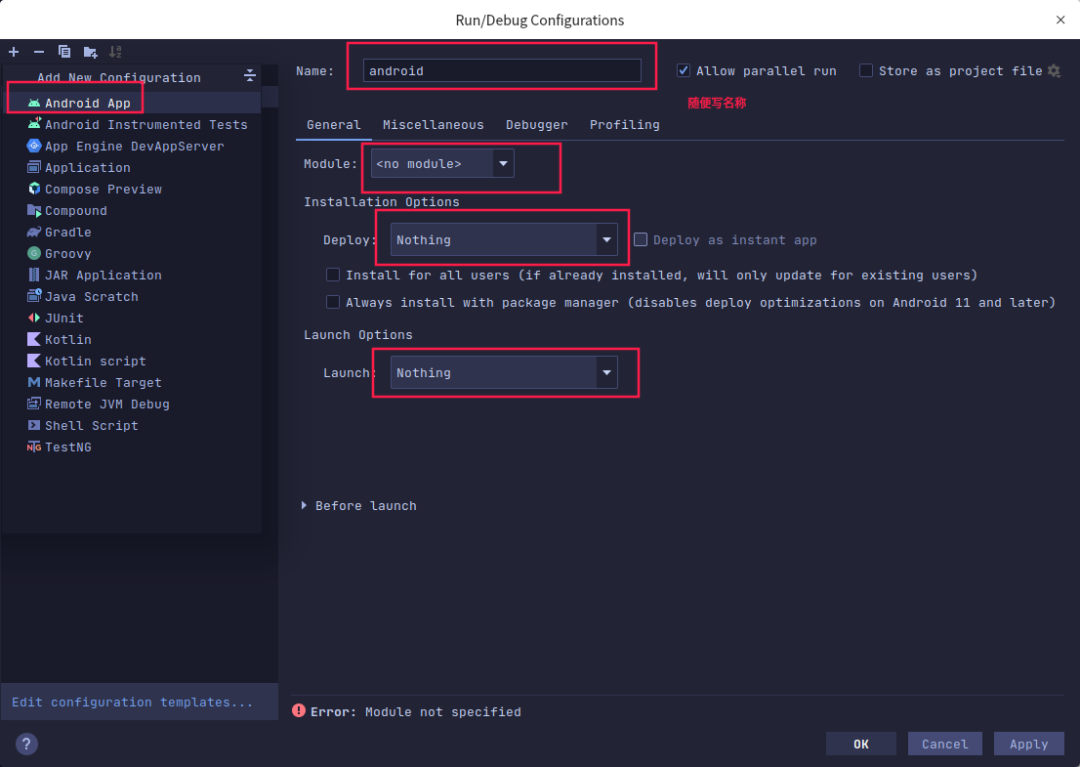
配置Run/Debug Configurations
開始調試 - 使用教程
在源碼的根目錄創建start_emulator.sh腳本,為了方便的啟動模擬器,輸入以下內容 后執行。
#!/bin/bashsource build/envsetup.shlunch 6emulator# sudo chmod 777 ./start_emulator.sh# ./start_emulator.sh
常用命令
# 第三方app需先以調試模式啟動app 點擊運行adb shell am set-debug-app -w com.example.dexlassloaders# 等待附加調試 會自動繼續運行 直到觸發斷點 # 系統進程可直接進行附加調試
案例一
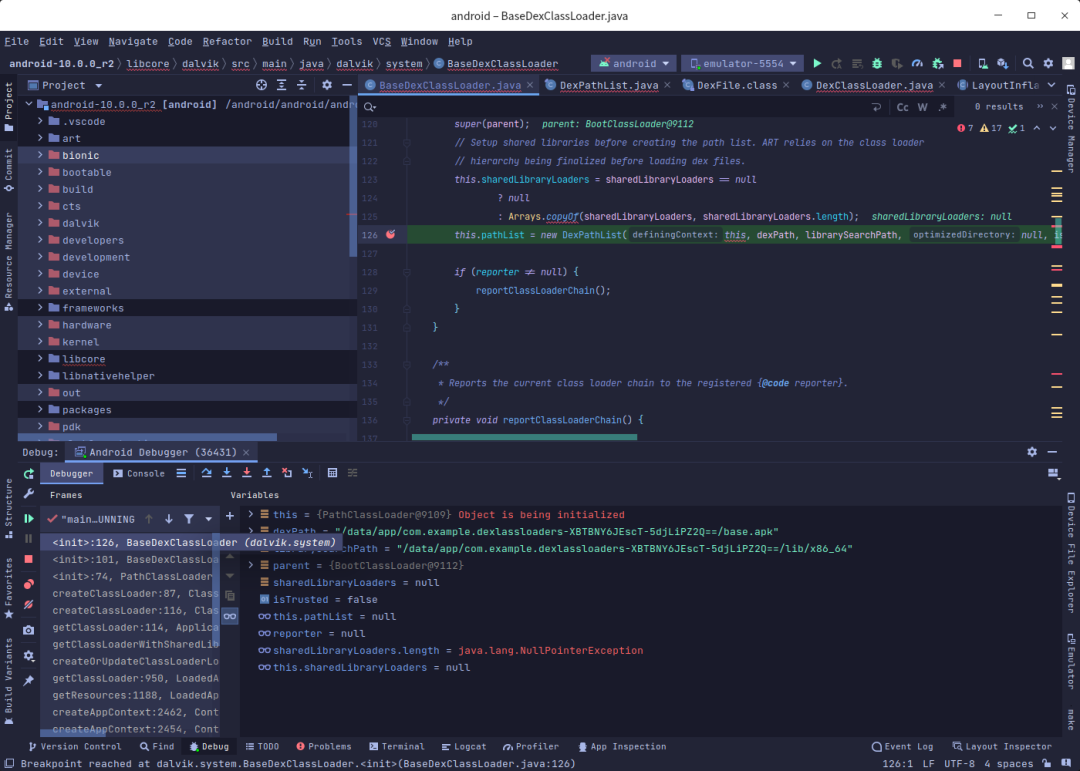
在系統源碼找到ActivityStarter這個類,在startActivityMayWait這個方法打斷點。
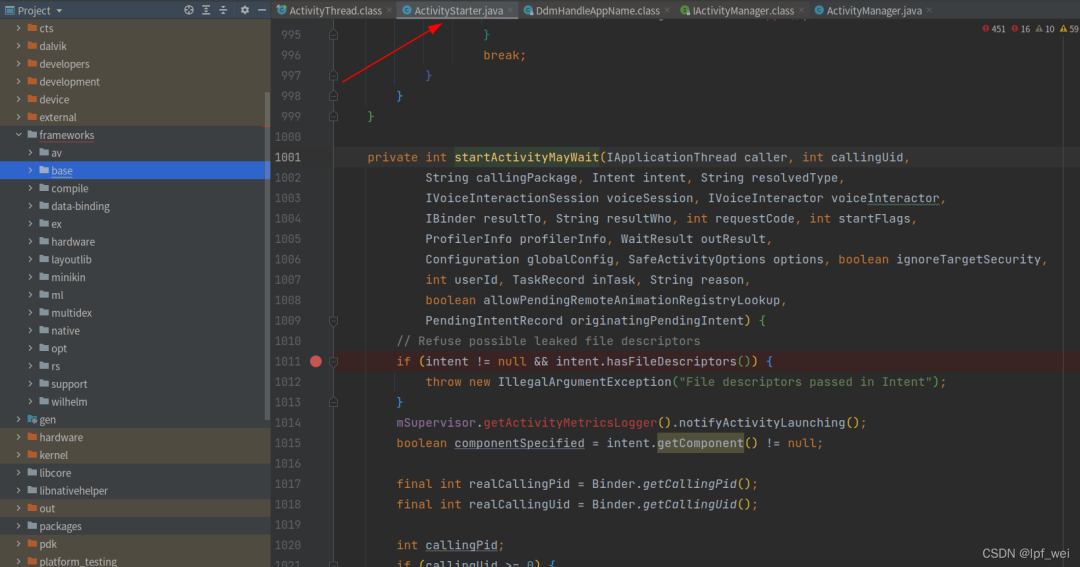
點擊菜單的Run–>Attach Debugger to Android Process,勾選Show all processer,選擇system_process 隨便啟動app 觸發斷點。
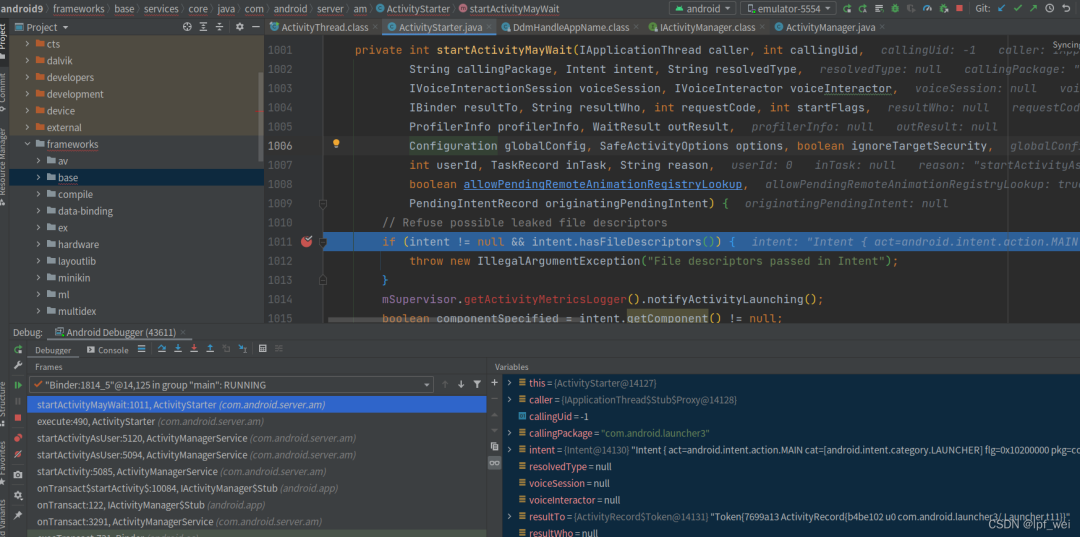
第三方app觸發 系統java層 調試成功
Android Native層源碼調試 - 需以源碼編譯的模擬器啟動
前置配置 source build/envsetup.sh lunch 22
# 進入源碼目錄cd /android/android/android-10.0.0_r2# 先初始化環境 主要為lunch 目標source build/envsetup.shlunch 22# 進入gdbclient.py 腳本目錄cd development/scripts# 調試模式啟動 第三方app 此命令需手動點擊adb shell am set-debug-app -w com.example.dexlassloaders# 以調試模式啟動 無需手動點擊adb shell am start -D -n com.example.dexlassloaders/.MainActivity# 查看進程pidadb shell "ps -ef | grep com.example.dexlassloaders"# u0_a103 6018 1631 0 18:24:11 ? 00:00:00 com.example.dexlassloaders# root 6046 1677 0 18:25:54 ? 00:00:00 sh -c ps -ef | grep com.example.dexlassloaders# root 6049 6046 0 18:25:54 ? 00:00:00 grep com.example.dexlassloaders# 執行此命令等待 輸出 vscode launch.json配置 報錯 請檢查pidgdbclient.py -p 6018 --setup-forwarding vscode# 沒調試完不要 按enter# 接著使用as 附加調試 或者adb forward tcp:12345 jdwp:6018 # (Where XXX is the PID of the debugged process.)jdb -attach localhost:12345
配置 VScode 運行和調試
獲取vscodelunch.json 配置
注意先選擇C/C++ 源碼 下好斷點 此時按F5 觸發。
gdbclient.py -p 6018 --setup-forwarding vscode輸出下面內容 把其中 {} 復制到 VScode launch.json。
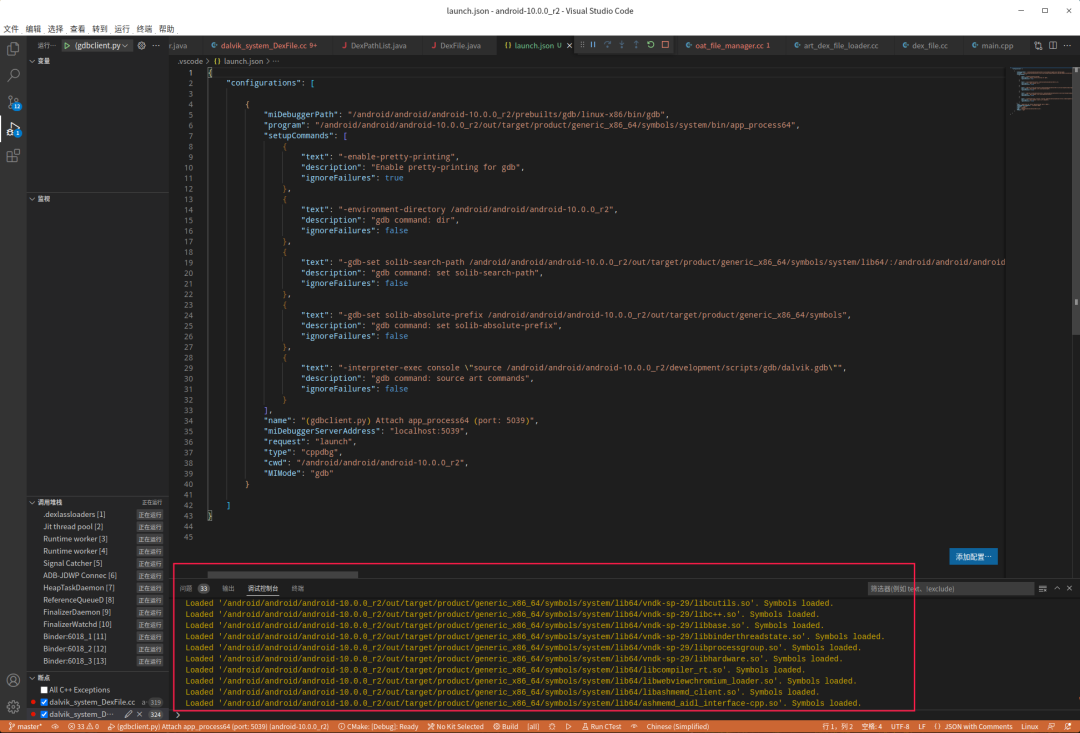
{ "configurations": [ // {} 復制到這里{ "miDebuggerPath": "/android/android/android-10.0.0_r2/prebuilts/gdb/linux-x86/bin/gdb", "program": "/android/android/android-10.0.0_r2/out/target/product/generic_x86_64/symbols/system/bin/app_process64", "setupCommands": [ { "text": "-enable-pretty-printing", "description": "Enable pretty-printing for gdb", "ignoreFailures": true }, { "text": "-environment-directory /android/android/android-10.0.0_r2", "description": "gdb command: dir", "ignoreFailures": false }, { "text": "-gdb-set solib-search-path /android/android/android-10.0.0_r2/out/target/product/generic_x86_64/symbols/system/lib64/:/android/android/android-10.0.0_r2/out/target/product/generic_x86_64/symbols/system/lib64/hw:/android/android/android-10.0.0_r2/out/target/product/generic_x86_64/symbols/system/lib64/ssl/engines:/android/android/android-10.0.0_r2/out/target/product/generic_x86_64/symbols/system/lib64/drm:/android/android/android-10.0.0_r2/out/target/product/generic_x86_64/symbols/system/lib64/egl:/android/android/android-10.0.0_r2/out/target/product/generic_x86_64/symbols/system/lib64/soundfx:/android/android/android-10.0.0_r2/out/target/product/generic_x86_64/symbols/vendor/lib64/:/android/android/android-10.0.0_r2/out/target/product/generic_x86_64/symbols/vendor/lib64/hw:/android/android/android-10.0.0_r2/out/target/product/generic_x86_64/symbols/vendor/lib64/egl", "description": "gdb command: set solib-search-path", "ignoreFailures": false }, { "text": "-gdb-set solib-absolute-prefix /android/android/android-10.0.0_r2/out/target/product/generic_x86_64/symbols", "description": "gdb command: set solib-absolute-prefix", "ignoreFailures": false }, { "text": "-interpreter-exec console \"source /android/android/android-10.0.0_r2/development/scripts/gdb/dalvik.gdb\"", "description": "gdb command: source art commands", "ignoreFailures": false } ], "name": "(gdbclient.py) Attach app_process64 (port: 5039)", "miDebuggerServerAddress": "localhost:5039", "request": "launch", "type": "cppdbg", "cwd": "/android/android/android-10.0.0_r2", "MIMode": "gdb"} ]}
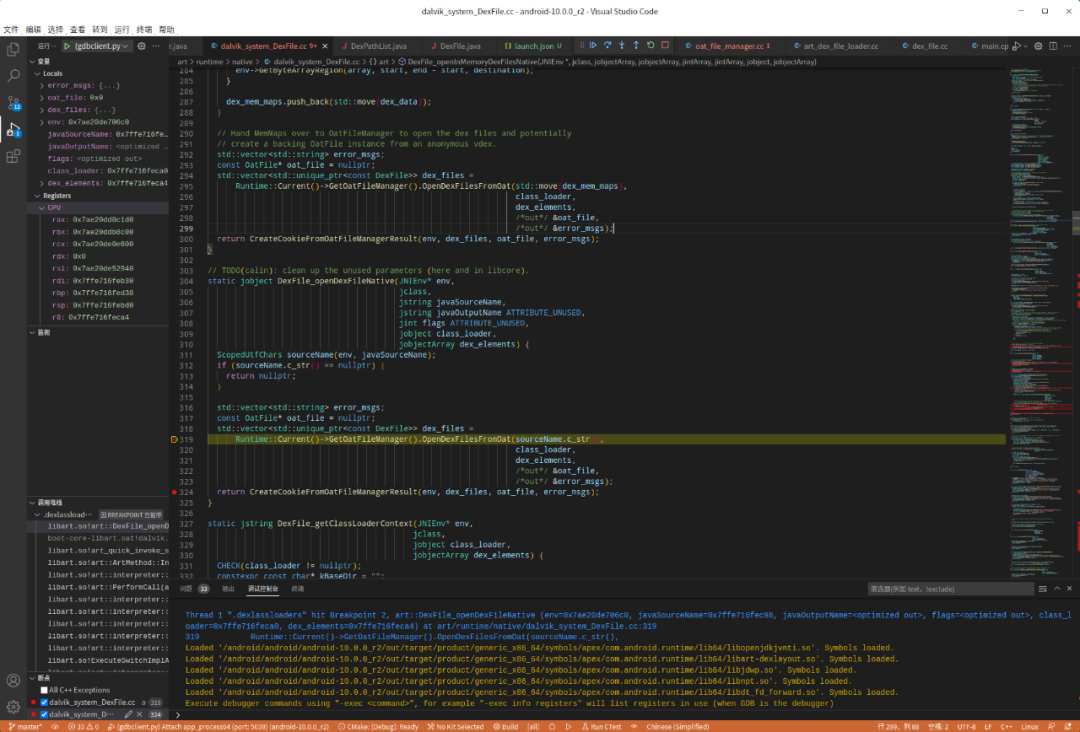
啟動native調試
- 輸出符號加載為連接調試gdb成功。
最后 打開AS open Android ipr 項目
- 按照java層 調試方法附加調試 觸發 第三方app執行。
- 到斷點處自然斷下來。
vscode 附加調試失敗
gdbclient.py -p 6018 --setup-forwarding vscode 執行之后 vscode 附加 發現鏈接失敗時
手動運行gdbserver
# 調試模式啟動 第三方app 此命令需手動點擊adb shell am set-debug-app -w com.example.dexlassloaders# 以調試模式啟動 無需手動點擊adb shell am start -D -n com.example.dexlassloaders/.MainActivity# 查看進程pidadb shell "ps -ef | grep com.example.dexlassloaders"# u0_a103 6018 1631 0 18:24:11 ? 00:00:00 com.example.dexlassloaders# root 6046 1677 0 18:25:54 ? 00:00:00 sh -c ps -ef | grep com.example.dexlassloaders# root 6049 6046 0 18:25:54 ? 00:00:00 grep com.example.dexlassloaders# 1. 進入手機 shelladb shell# 2. 切換root模式 普通手機為susu# 3. 手動執行gdbservergdbserver64 :1234 --attach 6018# 出現下面的表示 附加調試成功# Remote debugging from host 127.0.0.1# 4. 重新啟動一個終端# 4.1 進行端口映射adb forward tcp:5039 tcp:1234# 4.2 按照 獲取vscodelunch.json 配置 這個做 配置vscode 檢查5039端口# 5. 啟動vscode附加調試 - 先下斷點vscode 按 F5 啟動調試 查看調試控制臺,應該開始Loaded symbols 了# 6. 使用as 附加調試或者 執行下面的jdb 開始調試adb forward tcp:12345 jdwp:6018jdb -attach localhost:12345
 安全牛
安全牛
 LemonSec
 LemonSec
 商密君
商密君
 安全內參
安全內參
 安全圈
安全圈
 關鍵基礎設施安全應急響應中心
 E安全
E安全
 系統安全運維
 看雪學苑
看雪學苑
 看雪學苑
看雪學苑
 看雪學苑
看雪學苑